

 |
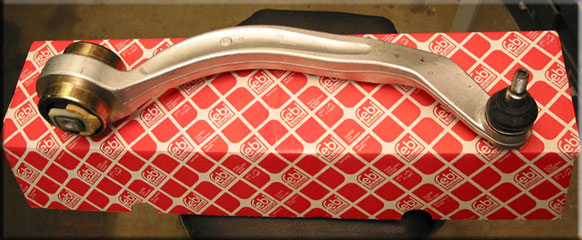
This is the new one, right out of the box. Pretty eh? Well. replacing it is not terribly difficult, just requires a few little tricks, and the help of a very special little tool (not required, but it makes life so much easier.) Basic tools required (aside from a good strong jack and stand), 18mm wrench, socket, ratchet, pry bar, ball joint tool 3287a, penetrating oil.. |
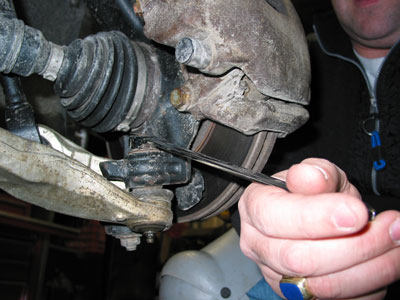
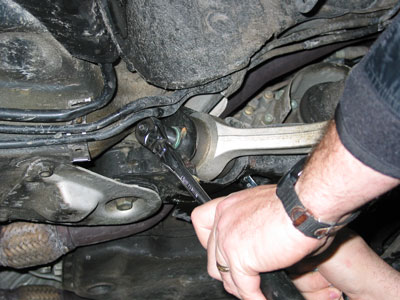
Step One: You have already safely jacked and secured the car, and removed the tire. Using your 18mm box end wrench, remove the nut on the balljoint end. It may require some penetrant, and a little force. I prefer long pattern wrenches for jobs like this. You get a lot more leverage, and don't end up using pipes etc.. On the bottom of the control arm in the picture, you might have noticed a grease fitting. I added these to most of the control arms on the car, in an effort to get them to last a little longer. This particular arm I added it AFTER it started clunking, just to make it stop clunking, which it did. I use Mobil1 synthetic grease. |
 |
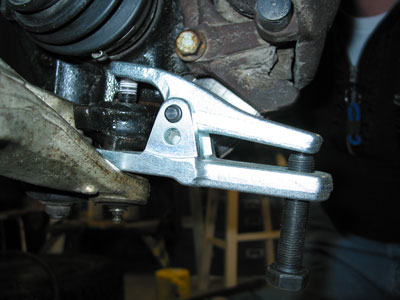
Here is the infamous VAG (it's actually make by Kukko) 3287a balljoint tool. This makes it possible to remove the joint without wanting to pull out the BFH, for which there is precious little room to give a good swing anyway. This is a pricey little tool, around $100 depending on where you get it (I got it from Zelenda Automotive) I gave it about 1/2 turn and the joint popped right out. Worth every cent. |
 |
| You can see in this picture the shape of the stud, where it sits in the knuckle. It's amazing how tight this grips, it made quite a bang when it broke free.. Trying to get this out without the special tool must be really tricky. | 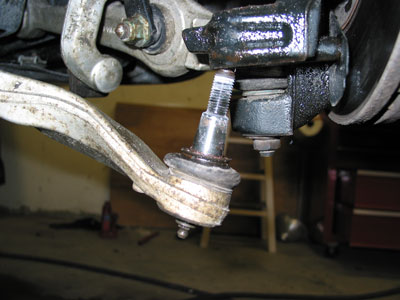 |
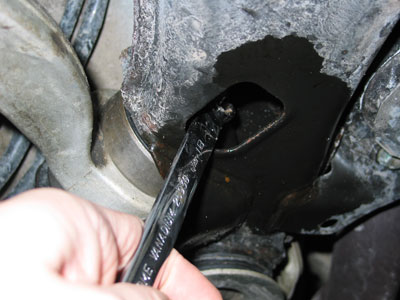
Next step is to remove the bolt that holds the inside on. Both sides are 18mm. I found that it was easiest to use a shallow socket to turn the bolt, holding the nut with the wrench. For some odd reason I don't have an 18mm deep offset wrench, which would have made this job lots easier. The nut sits quite deep in the subframe. Anyway, once you get the nut off, you need to get the bolt out. The factory service manual says to lower the subframe at the rear to get the bolt out. Well, you don't absolutely have to, and I didn't. What you do end up doing however is wiggleing the bolt out, sliding it under the fuel lines a little. It is not easy, but it's easier than lowering the subframe I suppose. |
 |
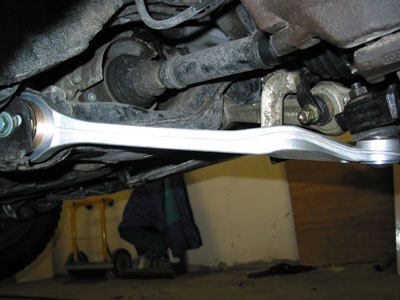
If you were to lower the subframe, I think you would need an alignment. I probably would consider getting one anyway, as you never know how much you may have changed the toe or camber by replacing a control arm. One might think not much at all, but there is a little bit of play in the pivot, and you never know exactly where it was when you started. Here you get a good view of how to attack the nut on the other side of the long bolt. Getting the bolt to slide back into the new arm for some reason was not as hard as taking it out of the old one. Be VERY careful with the fuel lines (passenger side) or brake lines (driver side).
|
 |
You will need to somehow preload the suspension before you can torque the bolt on the inner end. I use a hydraulic bottle jack on a concrete block to push up on the bottom of the stud for the front lower control arm.(Your floor jack might be a good idea too)Jack it till it starts to lift the car off of your stand a tiny little bit. Be very careful here. I suppose the jack could slip, which would cause the suspension to slam down. If your head was in the way, it would probably leave a pretty good dent. Torque the bolt to 66 lb/ft +1/4 turn. Torque the ball joint nut to 74 lb/ft. You may need to hold the stud with an allen wrench, to keep it from turning while you start the nut on.
|
 |